LeadSift User Manual
Complete guide to creating projects and generating AI-powered comments for social media lead generation
Table of Contents
Project Creation & AI Keyword Generation
Create projects to organize your lead generation efforts and use AI to generate relevant keywords
Step 1: Access Project Creation
Navigate to Dashboard
Log in to your LeadSift account and go to the dashboard
Click the Plus Icon
Look for the "+" button next to the project dropdown in the top navigation
Project Creation Dialog
A popup dialog will appear with the project creation form
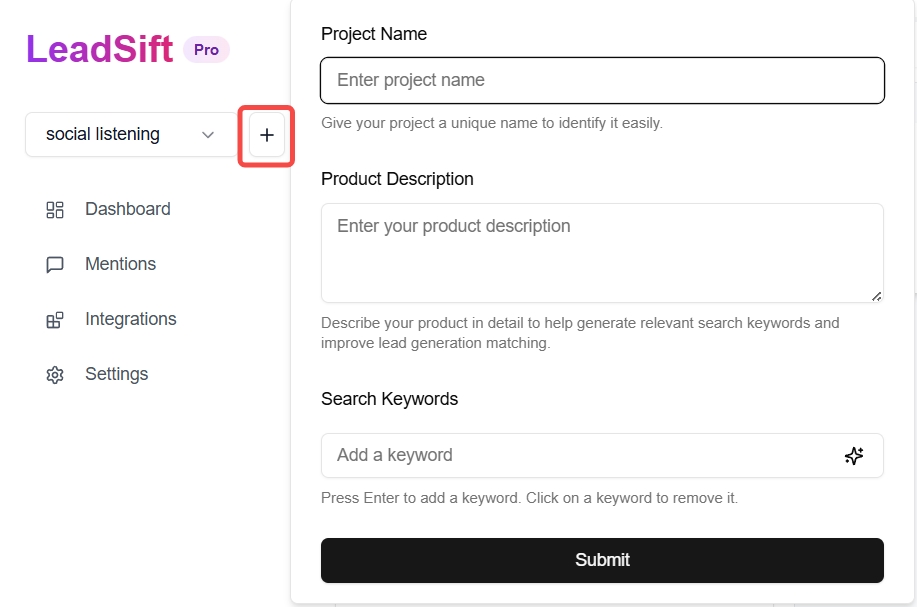
Project Creation Interface
Step 2: Fill Project Details
Project Name
Enter a descriptive name for your project (e.g., "SaaS Product Launch", "E-commerce Store")
Product Description
Provide a detailed description of your product or service (minimum 20 characters). Be specific about features, benefits, and target audience.
Example: "Our project management tool helps remote teams collaborate effectively with real-time task tracking, automated workflows, and integrated communication features."
Step 3: Generate AI Keywords
Click AI Generate Button
Look for the sparkles icon next to the keyword input field and click it
Wait for AI Processing
The AI will analyze your product description and generate relevant keywords (this takes a few seconds)
Review Generated Keywords
The AI will suggest 5 relevant keywords. You can add more manually or remove ones that don't fit
Example Keywords: "project management", "remote work", "team collaboration", "task tracking", "workflow automation"
Step 4: Submit and Create Project
Review All Information
Double-check your project name, description, and keywords before submitting
Click Submit
Click the "Submit" button to create your project
Project Created Successfully
You'll see a success message and your project will be available in the dropdown menu
Project Limits by Plan
Free
1
Project
Starter
5
Projects
Pro
20
Projects
Enterprise
∞
Unlimited
Best Practices for Project Creation
Be Specific with Product Description
Detailed descriptions help AI generate more accurate and relevant keywords. Include your target audience, main features, and unique value proposition.
Review Generated Keywords
Always review AI-generated keywords and add industry-specific terms manually. Consider adding competitor names, industry jargon, and problem-specific keywords.
Use Relevant Keywords
Focus on keywords that your target audience actually uses on social media. Think about how people would search for solutions to their problems.
Test and Iterate
Monitor which keywords generate the most relevant mentions and adjust your keyword strategy accordingly.
AI Comment Generation (Premium Feature)
Generate contextual, engaging comments for social media posts to increase engagement and lead generation
Prerequisite: Reddit Integration Required
Reddit Integration Required
Before you can use AI Comment Generation, you must set up Reddit integration. This ensures the AI has access to the social media content needed to generate relevant comments. Please complete the Reddit Data Source Integration setup first.
Feature Availability
Free Plan Limitations
AI comment generation is not available on the free plan. Upgrade to Starter, Pro, or Enterprise to access this feature.
Premium Features
All paid plans include AI comment generation with unlimited usage.
Step 1: Access Mentions Dashboard
Navigate to Mentions
Go to your dashboard and click on the "Mentions" tab in the left sidebar
Select a Project
Make sure you have a project selected from the dropdown menu at the top
Browse Mentions
Review the list of social media mentions that match your keywords
Step 2: Select a Mention to Engage With
Identify Engagement Opportunities
Look for posts where you can add value, answer questions, or provide helpful information
Click Comment Button
Find the comment icon next to the mention and click it to open the comment dialog
Review Post Content
Read the original post content to understand the context and tone
Step 3: Generate AI Comment
Click AI Generate
In the comment dialog, click the "AI Generate" button with the sparkles icon
AI Analysis
The AI analyzes the post content, your product information, and generates a contextual comment
Review Generated Comment
The AI-generated comment will appear in the text area. Review it and edit if necessary
Example AI Comment: "I've been using [Product Name] for remote team management and it's been a game-changer for our workflow. The real-time collaboration features really help keep everyone on the same page!"
Step 4: Post and Engage
Edit if Needed
Make any necessary edits to personalize the comment or adjust the tone
Click Submit
Click the "Submit" button to post your comment to the social media platform
AI Comment Features
Contextual Generation
AI analyzes the post content and generates relevant comments that match the conversation context
Natural Language
Comments sound natural and conversational, avoiding promotional or spammy language
Product Integration
Naturally incorporates your product information and benefits into the comment
Platform Aware
Comments are optimized for the specific social media platform's tone and style
Best Practices for AI Comments
Always Review Before Posting
AI-generated comments should be reviewed and edited if necessary before posting. Ensure they align with your brand voice and message.
Add Personal Touch
Consider adding personal anecdotes, specific details, or industry insights to make comments more authentic and valuable.
Follow Platform Guidelines
Ensure comments comply with the social media platform's community guidelines and terms of service.
Monitor Engagement
Track which types of AI-generated comments perform best and adjust your strategy based on engagement metrics.
Be Authentic
While AI helps generate content, ensure your comments reflect genuine interest and provide real value to the conversation.
Integrations & Notifications
Connect Reddit data source and configure email/Slack notifications to streamline your lead generation workflow
Reddit Comment Publishing Integration
Purpose
Reddit integration enables you to publish AI-generated comments directly to Reddit posts. This feature works in conjunction with the AI Comment Generation feature to help you engage with relevant Reddit discussions.
Access Integrations
Go to your dashboard and click on the "Integrations" tab in the left sidebar
Connect Reddit Account
Click on the Reddit integration card and follow the OAuth authentication process to authorize LeadSift to post comments on your behalf
Configure Target Subreddits
Select which subreddits you want to monitor and potentially engage with through AI-generated comments
Enable Comment Publishing
Once connected, you can use the AI Comment Generation feature to create and publish comments directly to Reddit posts

Reddit and Slack Integration
Slack Notification Setup
Purpose
Slack integration allows you to receive real-time notifications about new mentions directly in your Slack channels, keeping your team informed about relevant discussions.
OAuth Authorization
Go to your dashboard and click on the "Integrations" tab. Click on the Slack integration card and follow the OAuth authentication process to authorize LeadSift to send notifications to your Slack workspace
Configure Project Settings
Navigate to your project settings and find the notification module. Select Slack as your notification method
Choose Notification Channels
Select which Slack channels you want to receive notifications in. You can choose multiple channels for different types of mentions
Set Notification Timeframes
Configure when you want to receive notifications by selecting or editing the time periods. You can set up different schedules for different days of the week
Test Notifications
Once configured, new mentions will automatically send notifications to your selected Slack channels during the specified time periods
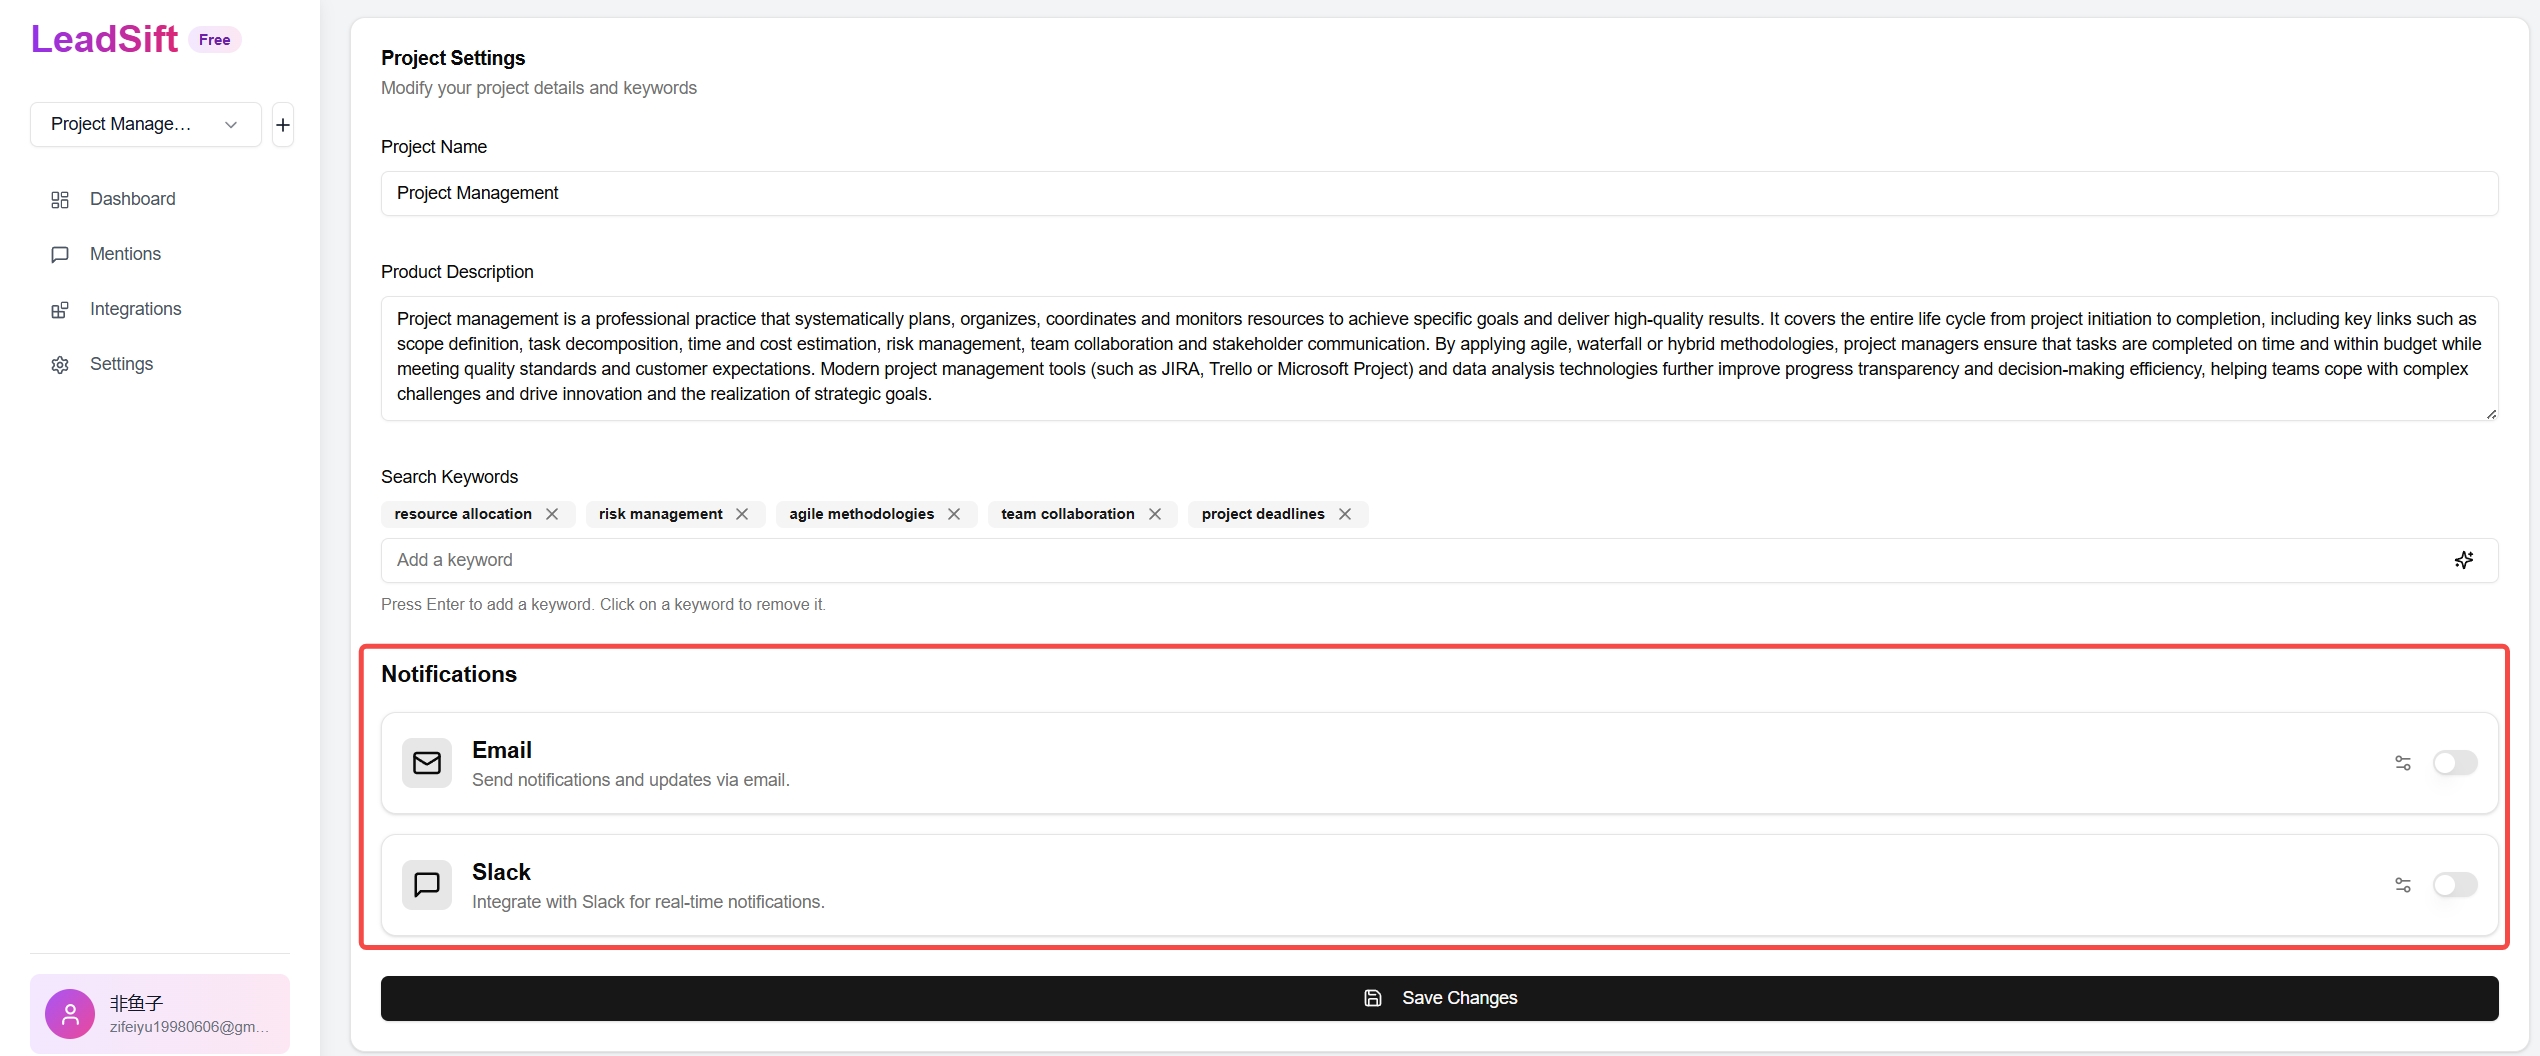
Project Notification Settings
Project Notification Settings
Access Project Settings
Go to your project dashboard and click on the settings icon next to your project name
Configure Email Notifications
Set up email notifications to receive mentions directly in your inbox
Email Settings: Choose notification frequency (immediate, daily digest, weekly summary) and specify which email addresses should receive notifications
Set Up Slack Notifications
Select Slack in the notification module and configure your notification preferences
Slack Settings: Choose notification channels, set notification timeframes, and configure message formats. Requires OAuth authorization from the Integrations tab.
Customize Notification Rules
Set up filters to control which mentions trigger notifications based on keywords, source, or engagement level
Notification Features & Benefits
Email Notifications
Receive mentions directly in your email with customizable templates and frequency options
Slack Integration
Send notifications to Slack channels for team collaboration and real-time alerts
Flexible Scheduling
Choose between immediate notifications, daily digests, or weekly summaries based on your workflow
Ready to Get Started?
Start creating projects and generating AI-powered comments to boost your social media lead generation